Using Machine Learning from your iOS or Android phone
27 October 2020

I am releasing a book about the React Native ecosystem, which covers everything I wish I had known before I started working with this technology.
If you appreciate my work and would like to show your support, please check the Road to React Native.
This demo shows you how to take pictures from your phone, upload them to the cloud, from there Google analyzes them and returns text-based information about your image.
Create your Google Cloud Account
I was reading the Google Vision documentation, and to have an API_KEY you need to complete theses 2 steps:
- Create a new project
- Activate the API
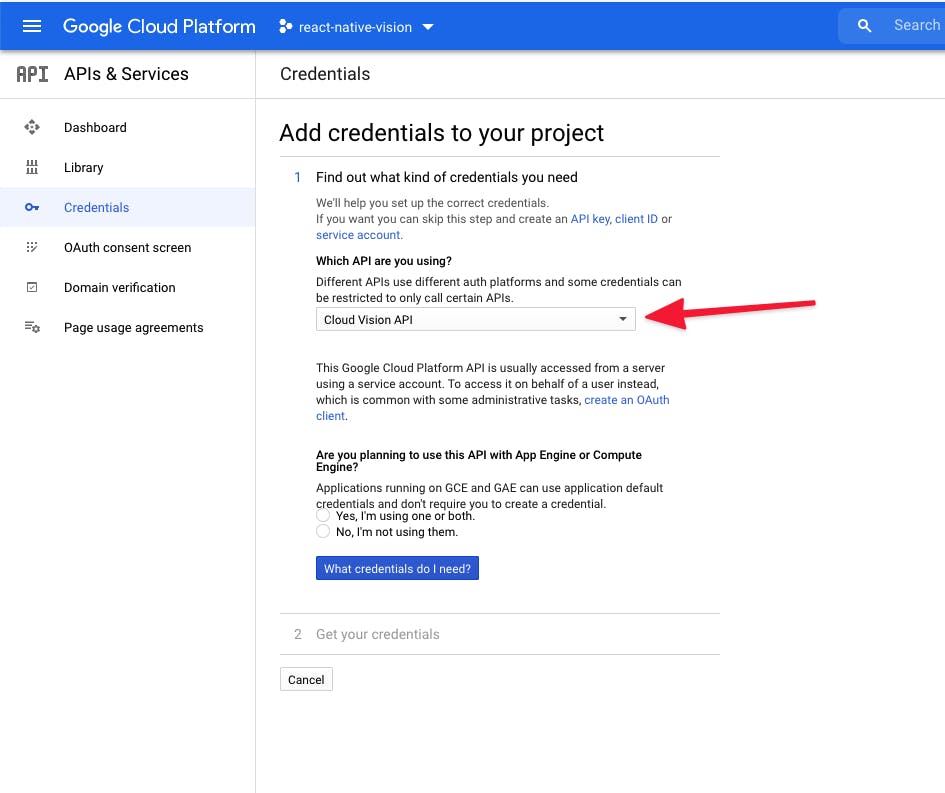
Select Google cloud vision and you should be able to Create Credentials to get your API_KEY.
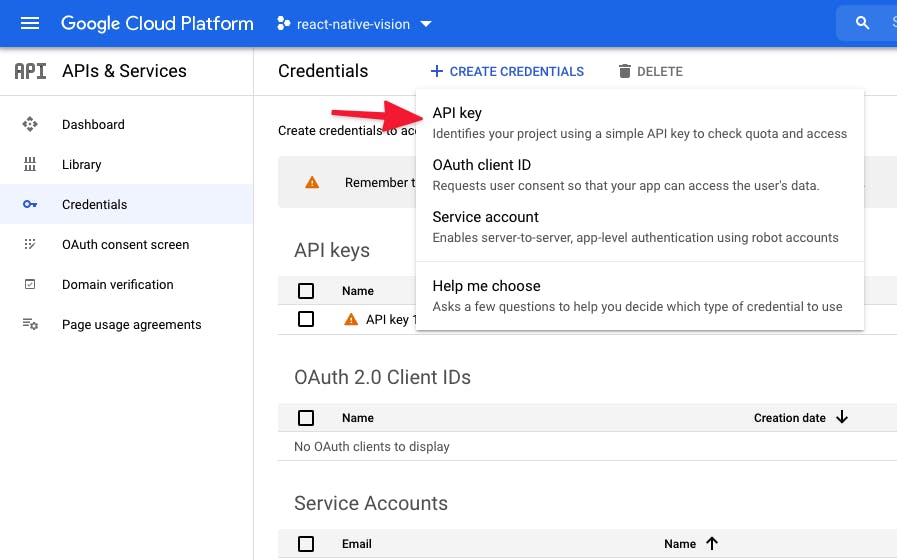
Don't forget to keep your API_KEY, we are going to use it later.
Asking devices permissions
To be able to use the camera, you need to ask some users permissions. From a brand new React Native Expo application (after running expo init), import the library:
import * as ImagePicker from 'expo-image-picker';Create a button
<Button onPress={askPermissionsAsync} title="Ask permissions" />And ask users permissions to use the camera
  const [permissions, setPermissions] = React.useState(false);
  const askPermissionsAsync = async () => {
    let permissionResult = await ImagePicker.requestCameraPermissionsAsync();

    if (permissionResult.granted === false) {
      alert('Permission to access camera roll is required!');
      return;
    } else {
      setPermissions(true);
    }
  };
Adding the Camera feature
we are going to use the launchCameraAsync feature from expo-image-picker
  const [image, setImage] = React.useState(null);
  const [status, setStatus] = React.useState(null);
  const takePictureAsync = async () => {
    const { cancelled, uri, base64 } = await ImagePicker.launchCameraAsync({
      base64: true,
    });

    if (!cancelled) {
      setImage(uri);
      setStatus('Loading...');
      try {

        // Call the Google API here

      } catch (error) {
        setStatus(`Error: ${error.message}`);
      }
    } else {
      setImage(null);
      setStatus(null);
    }
  };
Getting results from the Google Vision API
The last thing we need to add is calling the API to preview the results.
// Remplace "Call the Google API here" with this
const result = await callGoogleVisionAsync(base64);
setStatus(result);
const API_KEY = 'ADD_YOUR_KEY_HERE';
const API_URL = `https://vision.googleapis.com/v1/images:annotate?key=${API_KEY}`;
async function callGoogleVisionAsync(image) {
const body = {
requests: [
{
image: {
content: image,
},
features: [
{
type: 'LABEL_DETECTION',
maxResults: 1,
},
],
},
],
};
const response = await fetch(API_URL, {
method: 'POST',
headers: {
Accept: 'application/json',
'Content-Type': 'application/json',
},
body: JSON.stringify(body),
});
const result = await response.json();
console.log('callGoogleVisionAsync -> result', result);
return result.responses[0].labelAnnotations[0].description;
}And add the preview result on your App
{image && <Image style={styles.image} source={{ uri: image }} />}
{status && <Text style={styles.text}>{status}</Text>}
Your first mobile application with Machine Learning
If everything is correctly set up, congratulation! You can play with your new mobile app and try to identify everything.
All the code source is available on my GitHub repository.
References

Hi, I’m David, a french freelance developer working remotely. I’m the author of this blog, nice to meet you!
Subscribe?
Be the first to receive insightful articles and actionable resources that help you to elevate your skills.