Marketing automation for hackers
05 February 2021

I am releasing a book about the React Native ecosystem, which covers everything I wish I had known before I started working with this technology.
If you appreciate my work and would like to show your support, please check the Road to React Native.
One of my biggest concerns as a freelance is finding new clients.
I am a solo entrepreneur. If I am not looking for new job opportunities every week, I am in a risky position.
One day —for a random reason— I can quickly lose all my clients.
Literally, that's what happened 2 weeks ago, with something that no one could have predicted: a global world pandemic.
I lost 66.66% of my clients in one day.
To anticipate this problem, I have a mindmap to remember my sales routine:
- Always pitching my freelancing services
- Never stop selling (almost half of my time)
- Send client feedback every 2 weeks
These pieces of advice are nice but how can I work on my client's projects and sell my services in the meantime?
Let me introduce you to all my automation protips.
But first, you need to create some accounts on several services.
Requirements
- Airtable
- Zapier
- Mailchimp (you need a paid account for the automation funnel)
- Calendly
- Whereby
- One landing page
Step1: The landing page
Let's start with a landing page as an entry point to generate new leads.
We need to create a relevant and impactful speech:
- Why?
Why did you create this service to help customers in their life? - How?
Why are you the right person? - What?
The product/service you are selling - Call to action
with something valuable like a free consultation, a pdf with an infographic poster...
On my case, https://davidl.fr have a call to action to https://davidl.fr/onboarding
If someone sends me an email or a request on LinkedIn, I use this template:
---
Hello {name},
Thank you for contacting me. I am working remotely as a freelance developer.
In terms of timeline, I am currently accepting new projects for {current_date + 3 month}.
If you want to keep in contact, I created a small website for our next collaboration.
https://davidl.fr/onboarding
You will be the first informed when I’m available again.
Hoping to hear from you,
---
We have a landing page. It's great as a first step.
But we want to collect some data from our leads.
We can use a simple email, but it's not really efficient and scalable if we want to collect our leads information.
They are plenty of solutions available like Typeform, or Google form.
I am using Airtable because I built my custom CRM for all the things related to my freelance.
Step2: Airtable as a database
If you don't know the product, think of Airtable as a spreadsheet on steroïd.
Why did I choose this solution?
Because you can connect a bunch of different API's on it.
And API means automation, with another tool called Zapier.
But let's focus on building our sales workflow.
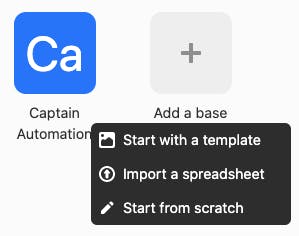
After creating a new account, Add a new base and select Start from scratch
Add your first field, you can start by the Budget of your lead.
- Protip: Take some time to dig on the existing field's type.
- Use email for email
- Long Text to collect answer to questions
- Single select for budget and
- Created time for the date of new records
- ...
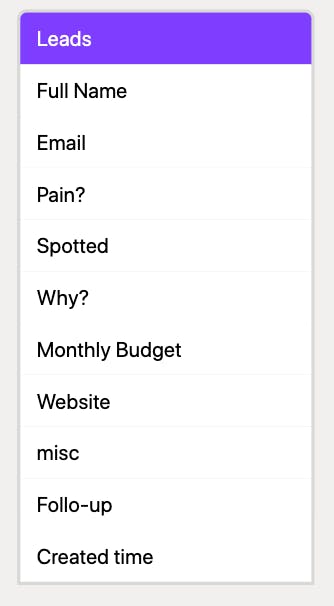
Here is an example of the schema of my leads database.
Step3: Collect leads with a form
We created the database structure in the Step2.
Now the interesting part.
Create a new form view.
💥 You have instantly a form to collect some data, accessible to an url https://airtable.com/<FORM_ID>
On my case, I added a good old iframe on my landing page https://davidl.fr/onboarding
Step4: Working as a plumber
All the information about our cold leads are stored in Airtable.
During the week, I am working on my client's projects.
I don't have time to follow if leads have completed the forms.
I need to send them some follow-up emails.
We can do this with Mailchimp.
Protip: If you don't have time to create a Mailchimp account, Zapier has a solution to send outbound emails. The logic remains the same.
We need a way to connect Airtable and Mailchimp together.
To achieve this goal, we can use Zapier.

This tool allows us to connect our new leads —coming from Airtable— and sending them emails thought Mailchimp.
Connect your differents account and create a new Zap like this:
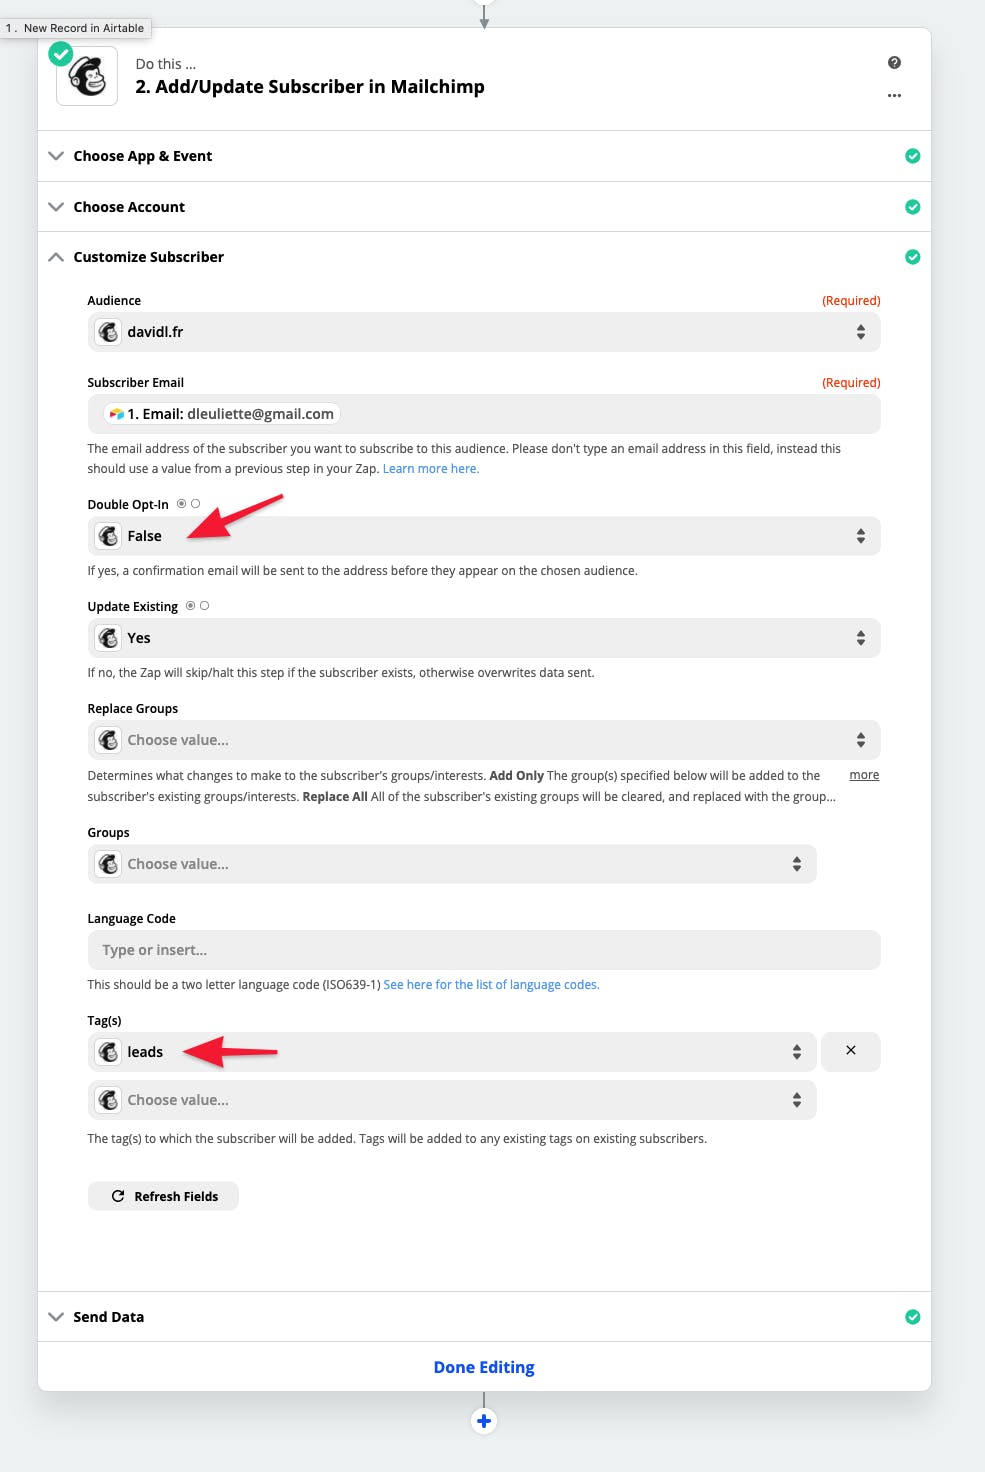
Protip: Double Opt-in value should be false (otherwise you can't send them direct email) and you need to add a tag (for multiple newsletters on the same account)
You can copy my zap workflow: Freelancing Sales Funnel with this link.
If everything is correctly setup, the 2 platforms are connected.
When a new lead completes the Airtable form…

…the email is available on Mailchimp

You can check the data on Mailchimp > Audience
Step5: Marketing automation
At this point, you should have:
- A landing page with some questions to filter your leads
- A platform for sending emails to your audience (identified with the tag lead).
Le'ts do some marketing automation with email nurturing.
I designed this simple automated sales funnel:
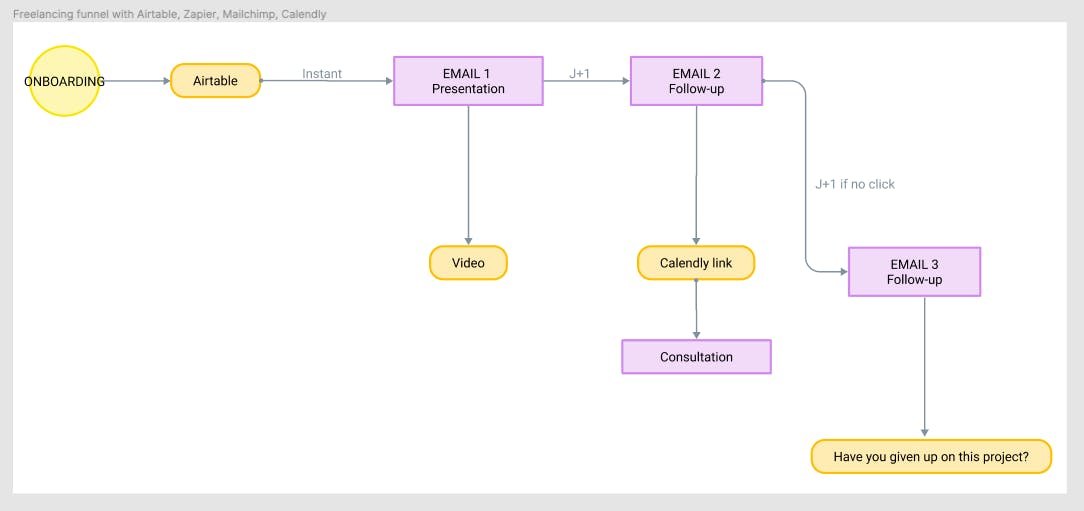
- Email 1: Introduction with a call to action to a video
- Email 2: Follow-up with a link to my calendar
- Email 3 (optional if no click on the email 2): Reminder to my calendar.
Design your emails template
Open Mailchimp > Brands > Templates and create a new email without any design.
Over the years, I learned that plain emails not only save time but work better.
Just write plain email with simple text. The typography-design-tools allowed are italic or bold.
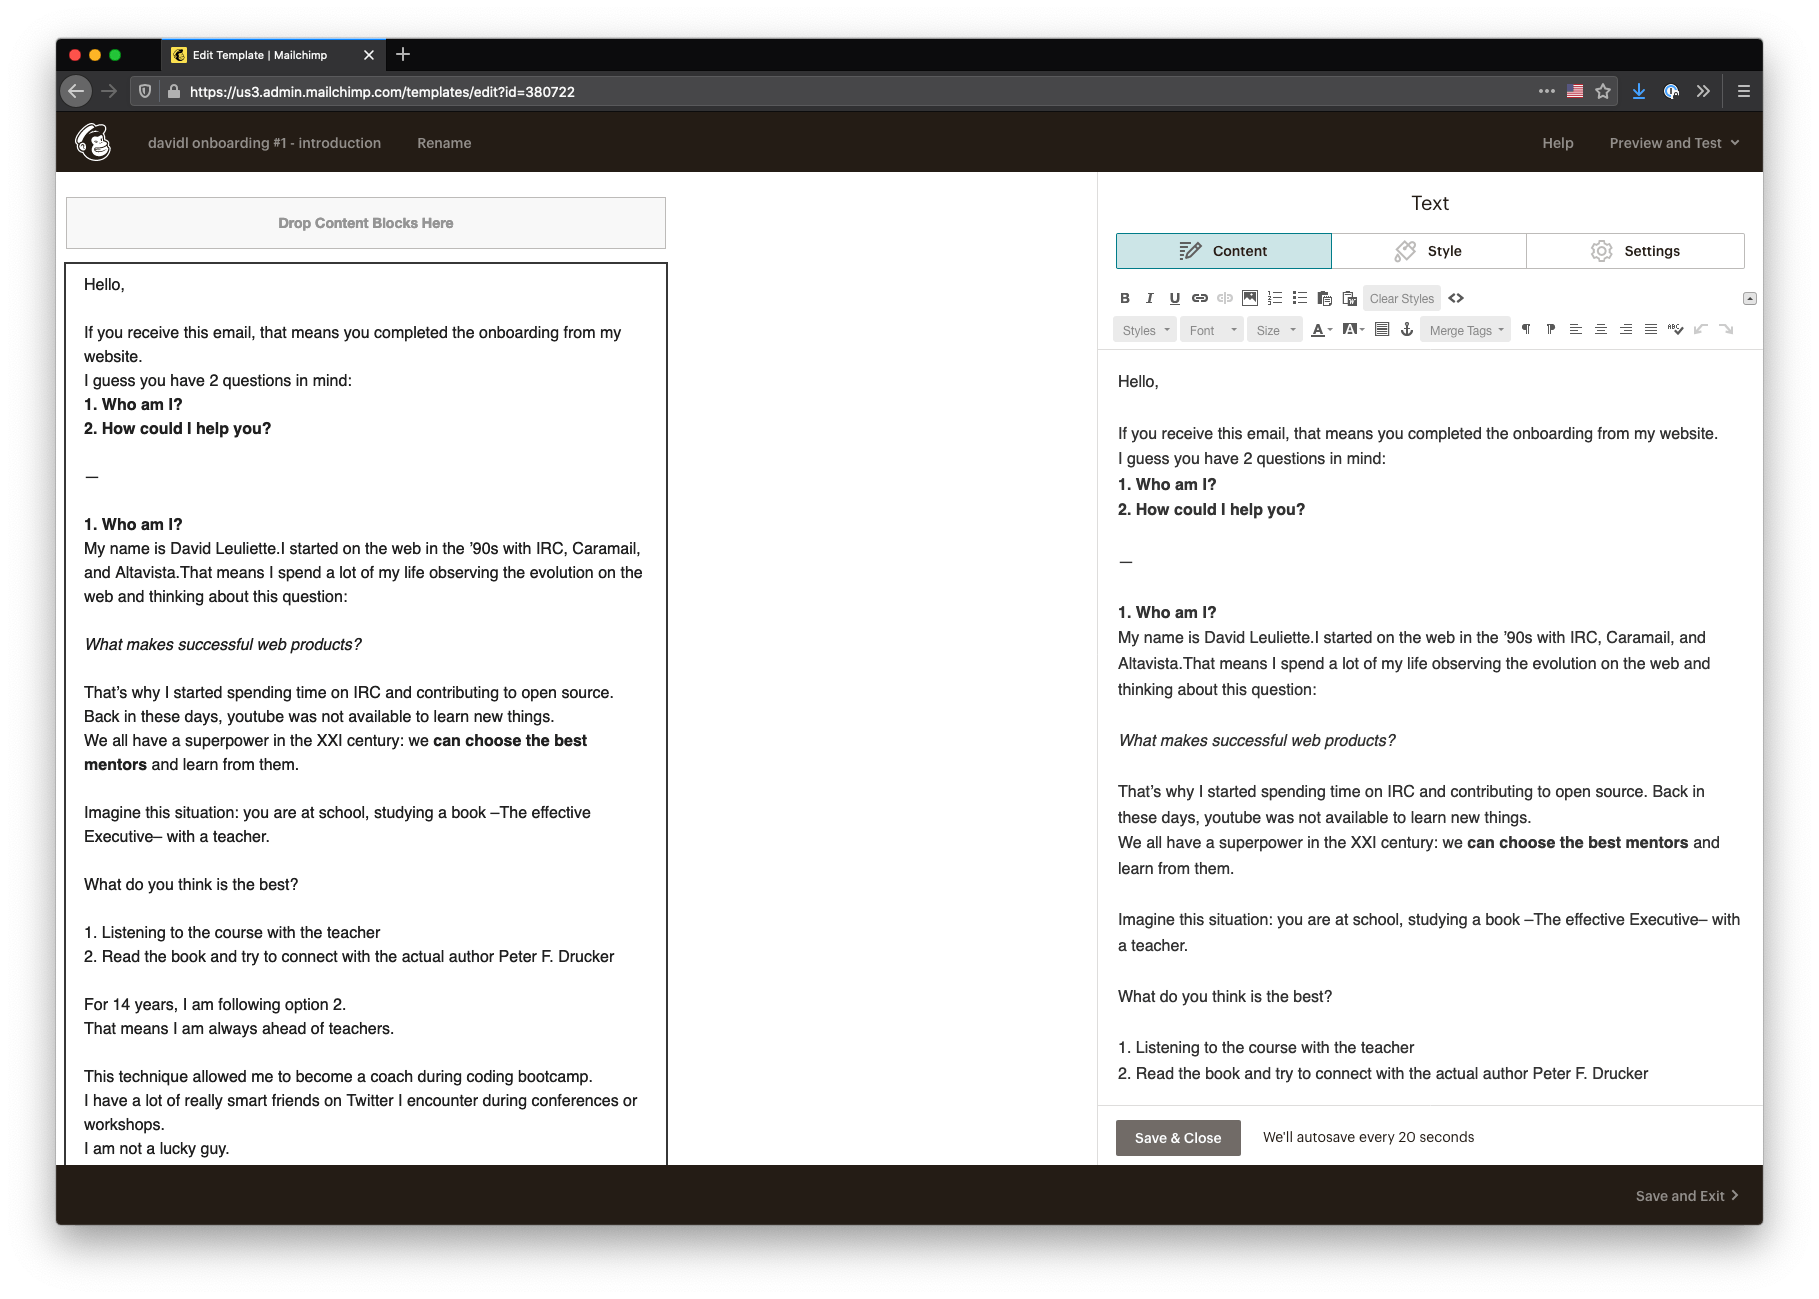
Protip: Don't forget, 1 email equals 1 call to action.
Create your sales funnel
Once all your templates are ready, you can create you automated sequence of emails.
On Mailchimp > Automate > Email > Create a custom automated email.
Now you can select your templates, choose trigger options and the schedule of your emails.
On my case I have:
Email 1: Introduction
Trigger: Immediately
Email 2: Link to calendar
Trigger: 1 day after the previous email
Email 3: Follow-up
Trigger: 2 days after subscribers do not open previous email
Step6: Automated consultation with Calendly
When new leads complete the funnel, they can book a consultation on my calendar.
Scheduling is hard.
If you don't want to fall in the infinite loop of doom with emails follow this advice: create a dedicated calendar.
I use a tool called Calendly for the bookings and whereby for the video consultation.
On the email 3, I share this link as a call to action https://davidl.fr/consultation
Protip: On calendly ask for the phone number. I have a lot of people who doesn't show up on whereby for random reasons.
Full stack sales on autopilot
That's it, you should have an entire automated system.
Don't forget to try multiple times all the steps, and check if the automation are not in pause on Mailchimp and Zapier.
It happens when you edit something and quit without saving.
Here is a recap
- Airtable as a database for everything (Or you can use the word CRM because you are a business guy now)
- Zapier to connect data to different services
- Mailchimp for the email nurturing
- Calendly as digital secretary
- Whereby for the video call
- One landing page Because it looks professional, but you can use all the services independently

Hi, I’m David, a french freelance developer working remotely. I’m the author of this blog, nice to meet you!
Subscribe?
Be the first to receive insightful articles and actionable resources that help you to elevate your skills.